As discussed at the research and astrophotography meeting, I suggested a project for those of us interested. It will involve doing differential photometry this summer on a very peculiar star. The star is Tabby's Star or KIC 8462852 or TYC 3162-0665-1.
The star is about 12th magnitude and both Luna 1 and Luna 2 will easily pick up and we can compare its brightness to neighbor stars.
Reason why we would want to image it is because it has strange dips in brightness that is so far unexplained. In fact in some instances it dimmed up to 22%!
Not only that, it also has smaller dips in brightness that are very irregular. A month ago, a new paper was published showing that this star has dimmed by about .16 of a magnitude over last century.
Overall, I think this should be very exciting and challenging project. At NJAA, we have a book called "The handbook of Astronomical Image Processing". It has a very good information about how to do photometry. Also, there is a lot of resources on the web about it.
Here are some of the links to learn more about this star.
This is the original paper that brought it to attention. After that a lot of news sources started talking about it.
http://arxiv.org/pdf/1509.03622v1.pdf
Wiki article on it
https://en.wikipedia.org/wiki/KIC_8462852
Recent paper that showed it slowly getting dimmer over last 100 years.
http://arxiv.org/pdf/1601.03256v1.pdf
Phil Plait's article
http://www.slate.com/blogs/bad_astronomy/2016/01/18/tabby_s_star_faded_substantially_over_past_century.html
AAVSO alert notice to start imaging it
https://www.aavso.org/aavso-alert-notice-532
Saturday, February 13, 2016
Tuesday, December 8, 2015
M31: The Great Galaxy in Andromeda
Its taken over a year of imaging and collaboration with Jim Roselli to get here, but I've finally made an image that I am truly proud of. An image of the Andromeda Galaxy, made with some modest gear: A Canon 550d (t2i) a Canon 75-300mm f/4-5.6 kit lens, and a kenko skymemo equatorial mount. Took 100 120 second images of the galaxy at f/8 and ISO 1600. 95 of the best images were median stacked in deep sky stacker. The outputted image was then processed in Pixinsight and some final tweaks were made in Photoshop CC, this is the image.
Judson Graham


Wednesday, November 18, 2015
Pleiades and California Nebula widefield
A widefield image of the Pleiades and California Nebula taken with a Canon 550d 50mm 1.8 II lens at F/5.6 and ISO 3200 95 2.5 min. subs were registered and median stacked in Deep Sky Stacker, and processed in Photoshop CC

Judson Graham

Judson Graham
Thursday, November 5, 2015
Tim's image of the M1 Crab nebula
Tim Schott took this image a couple nights ago when it was nice and clear as well as surprisingly warm for the season. The colors came out very well.


Wednesday, October 21, 2015
Solar Test Using new Point Grey CCD Camera
Here's a stack I made of a Ha test that Vladimir Alexandrov did before I got to the observatory on the 18th.
This image has very fine detail right from the camera, making it easy for me to combine the images.
This is the same prominence mentioned in my previous post.... just some hours prior.
Keith

This image has very fine detail right from the camera, making it easy for me to combine the images.
This is the same prominence mentioned in my previous post.... just some hours prior.
Keith

Sunday, October 18, 2015
Huge Solar Prominence
I went to the observatory today to pick up a Ha scope for my outreach at a local high school this coming Tuesday. There was a huge QO team (8 people!) with all the solar scopes already outside showing the public the sun between clouds. It seems we have a lot of excellent new QO's in training.
When I looked through the 90mm Ha scope I was amazed to see this massive prominence coming out of sunspot (probably will be given #2436... it wasn't yet numbered at the time of this writing) and then crossing the limb to retreat back into the solar chomosphere on the back side.
Beautuful! That view from the 90mm Ha filter on the Teleview 80 is v-e-r-y impressive.
I plan to have my 102mm ES with a Lunt Solar Diagonal alongside this scope for the kids.
It's supposed to be a nice clear day, but I'm still keeping the fingers crossed.
I took this image with my Samsung S5.
Keith Marley

Sunday, October 11, 2015
Tim Schott made a great SHOT!!!!
Here is an image he took this past week of NGC 891, a galaxy about the same size of the Milky Way and around 30 million light years away in the constellation Andromeda. His PHD Guiding software appears to be doing a fine job giving nice round stars for ten minutes on his mobile setup (INSIDE New Jersey for cryin' out loud). The dust clouds that block much of the galaxy's light are distinctly visible.
This is an great image for an 8" scope..... compare his image to the one at the bottom with 12x more time exposure and probably from a darker sky site.
Excellent work Tim!
You've come a long way in a short time.
 Image by NJAA member Tim Schott

This is an great image for an 8" scope..... compare his image to the one at the bottom with 12x more time exposure and probably from a darker sky site.
Excellent work Tim!
You've come a long way in a short time.


Image by R. Jay GaBany
The bottom image was produced using a RCOS half meter telescope, Apogee Altra U16M camera ($13K) camera and Astrodon E-Series Filters.
Exposure times: 1,710 minutes Luminance, 120 minutes Red, 120 minutes Green, 120 minutes Blue (all 1x1).
Some of this info was reproduced from www.Cosmotography.com
Keith Marley
Monday, October 5, 2015
Some Deep Sky Images From Member Perry Arts
NGC 6946 – Fireworks Galaxy
Taken: 2015-07-17, 2015-07-22, 2015-07-24, 2015-07-25
Location: Branchburg, New Jersey
Telescope: CPC Deluxe 1100HD @f/10
Camera: Nightscape 8300 OSC, no binning
Exposures: 65 - 180 sec subs
Capture software: PHD, Maxim DL
Processing software: PixInsight, Photoshop

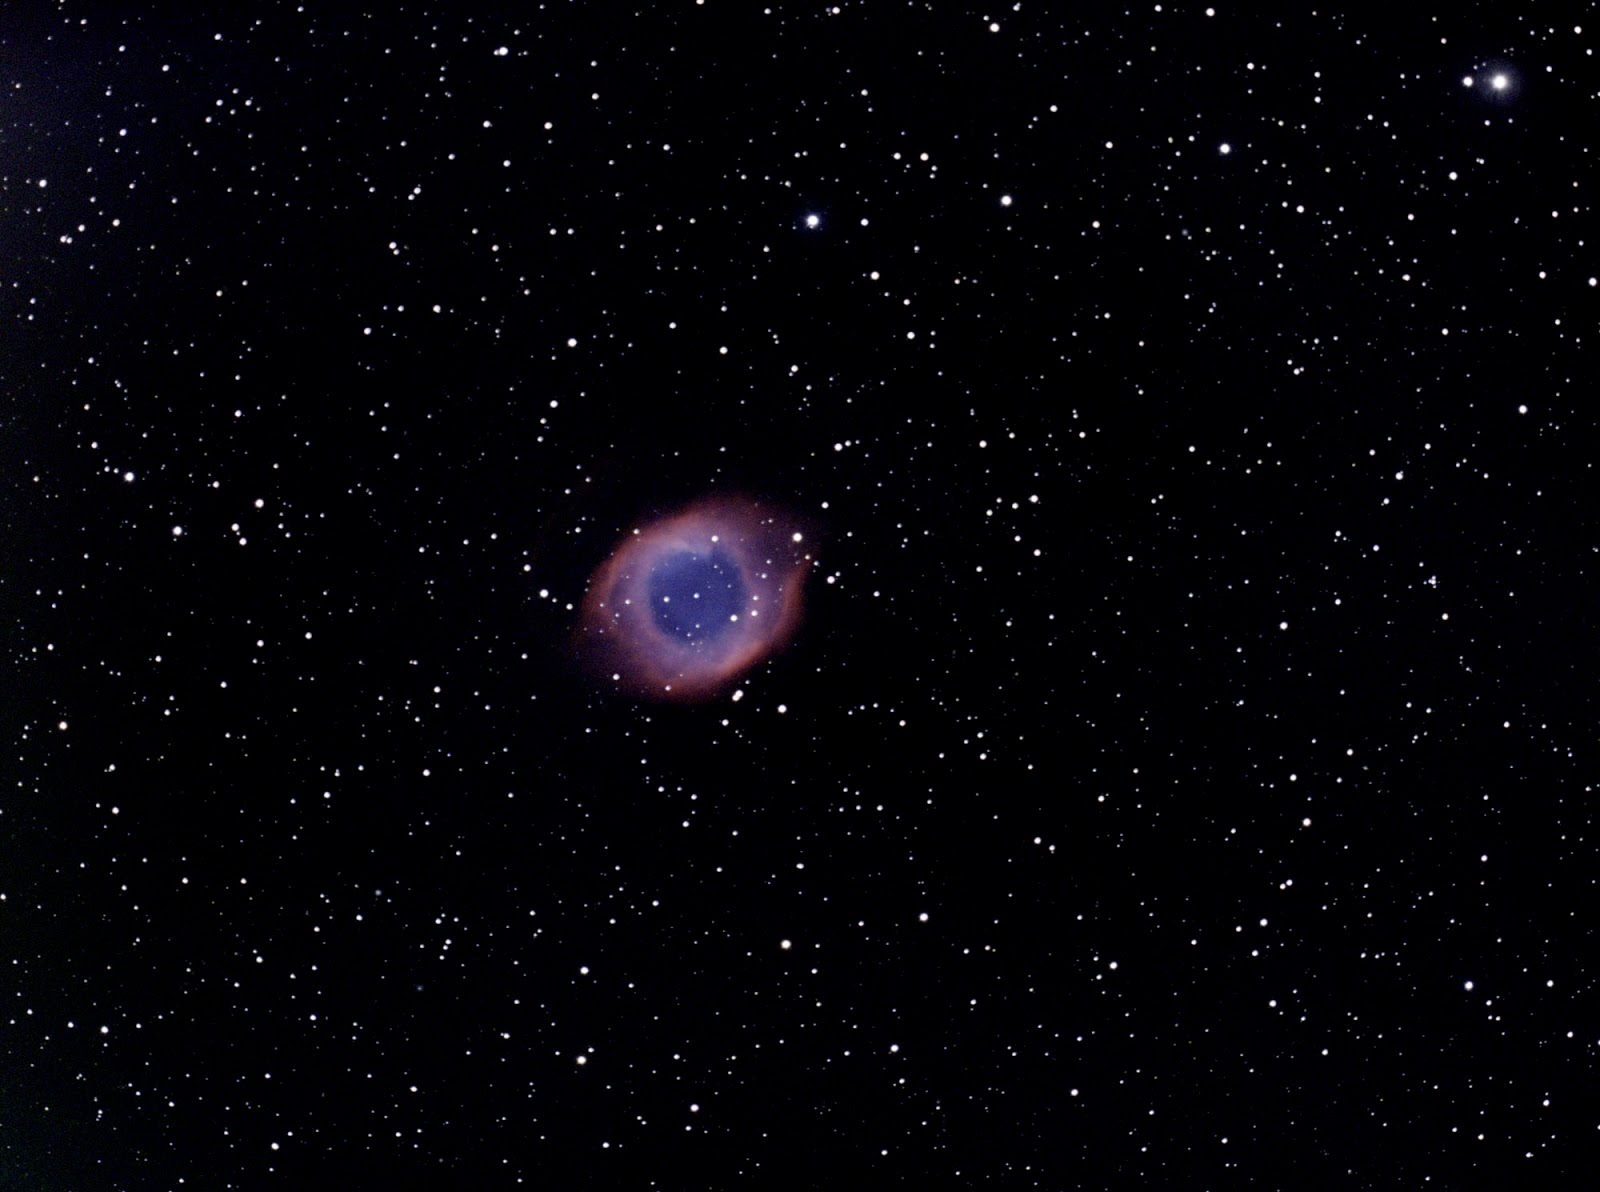
NGC 7293 – Helix Nebula
Taken: 2015-09-14, 2015-09-15, 2015-09-16
Localtion: Branchburg, New Jersey
Telescope: CPC Deluxe 1100HD Hyperstar @f/2
Camera: Nightscape 8300 OSC, no binning
Exposures: 40 - 180 sec subs
Capture software: PHD, Maxim DL
Processing software: PixInsight, Photoshop
NGC 7635 – Bubble Nebula
Taken: 2015-08-15, 2015-08-16, 2015-08-23, 2015-09-07
Location: Branchburg, New Jersey
Telescope: CPC Deluxe 1100HD @f/10
Camera: Nightscape 8300 OSC, no binning
Exposures: 57 - 180 sec subs
Capture software: PHD, Maxim DL
Processing software: PixInsight, Photoshop

Perseid
Taken: 2015-08-13
Location: NJAA
Camera: Fuji S5 Pro DSLR
Lens: 17mm
Exposures: 30sec f/4 ASA 800
Processing software: Photoshop

Images by Perry Arts
Tuesday, September 22, 2015
PLEASE give your name when you post
Identify yourself and claim ownership for your work on the blog please.
It will be greatly appreciated by our readers and for future follow-up.
Thanks
Keith
Monday, September 21, 2015
INSTRUCTIONS: For Re-calibrating Luna II
We all Make mistakes, weather it be forgetting to turn off the coffee pot, spilling a drink, or not hibernating a telescope. So if you have crashed Luna II or are going to use it and think you may, this is the instructions for re-calibration of Luna II our second largest telescope at NJAA.
So, you've crashed Luna II or you showed up and it was not calibrated, but don't worry this will only take 10 minuets or so! If you are already familiar with Celestron's three star alignment, don't Read any further, because you already know how to align the scope.
Step 1: Switch Position. Select a three star alignment using the 6 and 9 keys to scroll. It will now say "SET SWITCH POSITION". Press "ENTER" the telescope will now slew to the polar north. Since Luna II on a permanent mount, it is already polar aligned, so you can just say "ENTER or ALIGN" to that; keep in mind that the Celestron paddle has instructions scrolling on it all the times and press the keys it tells you to!
Step 2: First Alignment Star. After you have completed the first step you should be on a screen that says "SELECT FIRST ALIGNMENT STAR". Using the 6 and 9 keys, scroll through the list of stars and pick a bright one or a star you are familiar with. Since this is the first star, the telescope will be considerably off mark. Use the attached Telrad finder scope and center the star with the arrow pad on the paddle. You can change the slew speed by pressing "RATE" and then the number you want. Usually I use speed 9 for centering the object in the Telrad, and 5 for fine adjustment in the eyepiece; anything below 4 is so slow that the movement will be unnoticeable- even at 3910mm! Once the star is in the center ring of the Telrad, it should be in the eyepiece. Center the object in the eyepiece in the same manor that you did with the Telrad, but with a slower slew speed. When you're done press "ALIGN"
Step 3: Second Alignment Star. The procedure is the same as the first alignment star, but the telescope will be more exact, the Telrad may not even be needed. please REMEMBER TO TURN OFF THE TELRAD, because its annoying when you show up and the thing dosen't work!
When you're done press "ALIGN".
Step 4: Third Alignment Star: The procedure is the same as the Second alignment star however it should be pretty close to centered in the eyepiece. Center it and press "ALIGN". now you can press "UNDO" until you are at the main "CGE READY" screen, unless you want to add more alignment stars.
Congratulations! You Have Successfully Realigned Luna II! Now go go browse the cosmos with Celestron's most advanced mount and telescope! Thanks for Reading,
Judson Graham
Subscribe to:
Posts (Atom)